Pie Crust: the Odyssey
 The Search for the Perfect Recipe is the blight of all perfectionist cooks everywhere. The bug bites, and suddenly all you want to do is cook the same dish, over and over again, until everyone around you swears that they cannot look at – let alone eat- another roast chicken/banana mousse/egg custard/your-current-food-obsession-here. You, of course, feverishly exclaim that it’s not the same roast chicken; each recipe is a slight modification of the previous one, edging painfully closer to that ideal that only you can mentally taste. Until one day you find yourself eating banana mousse for breakfast, and realize you can’t taste it any more. And you sadly, regretfully, move on. But once in a blue egg-custard-moon, you actually reach your goal. You make something that fulfils the restless craving, that lives up to the fantasy, that – in that first, incredulous mouthful – doesn’t make you think, “Well, maybe if I tweak it just so….”. It sates you. At least for that moment.
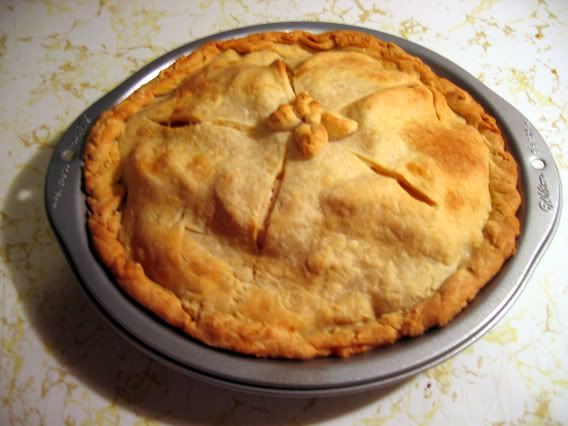
I have conquered the American pie crust.

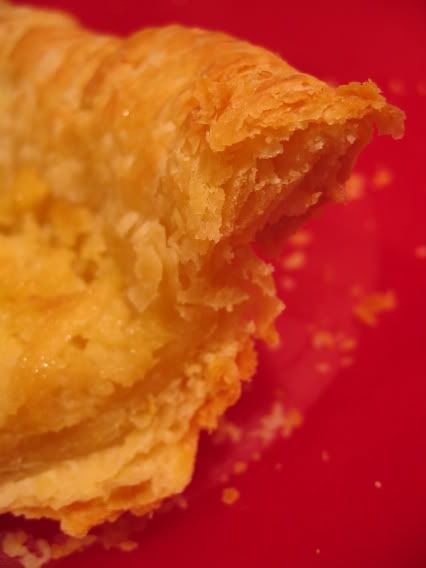
“Easy as Pie” is a misnomer if ever I heard one. Pie is a complex process, and the crust is probably the hardest part of all. A pie needs a flaky, buttery, golden crust, both light yet satisfyingly crispy, to perfectly balance the juicy, soft fruit (or other) filling. Like most baking recipes, pie crust depends on three elements:
- the ingredients,
- the ratio of ingredients,
- and the technique.
Its bare-bones composition is a combination of fat (butter, lard), flour and ice water. Then you can add acid ingredients like orange juice, yoghurt, or vinegar, to tenderize the crust. The worst-kept secret in the American culinary establishment is lard. Butter makes things tasty, but is difficult to work with, and lard makes things flaky, but is totally tasteless. So most recipes call for a mixture of the two, but I still find that marvellous butter taste is compromised. The really hard part is combining it together, because flakiness depends on the flecks of butter staying cold in the dough. So you have to keep your hot little hands off as much as possible!
In my odyssey, I experimented with recipes, techniques and tips from the beatific pie stall lady at my local farmers’ market, prize-winning, pie-baking Chowhounds, Cooks’ Illustrated “America’s Test Kitchen Cookbook”, the Pie and Pastry Bible, Epicurious, Williams Sonoma, and Nigella Lawson’s "How to Eat". My final recipe is a sort of modified pâté sucrée, using butter for flavour, cream cheese for flakiness, orange juice for tenderness and an egg yolk for richness and easier handling. Since poor students sadly don’t have Kitchenaids, I adapted the recipe to be made by hand.
For one 9- inch open pie crust, you will need:
1 cup all-purpose flour
3 generous tablespoons sugar
4 TBS unsalted butter, frozen
2 TBS cream cheese, cold, cubed
1 egg yolk
cold water
cold orange juice
A pinch of salt
Leave the butter in the freezer until it’s rock hard. Put the flour and sugar in a bowl, and mix with a whisk to remove any lumps. Put the cream cheese in the flour, and toss lightly to coat. Take a dinner knife in each hand, with the blades facing outwards, and use a scissor motion to slice through the flour. Your right hand knife draws a line from left to right, and your left hand knife draws a line from right to left, the two knives narrowly missing each other in the middle. This way you cut the cream cheese into the flour, and any larger, unyielding lumps will hopefully get caught between the two ruthless blades, and mercilessly squished. When there are no big lumps of cream cheese left, take the butter out of the freezer, and grate it into the flour using the coarsest side of a box grater or other device. Repeat the slicing motion with your knives to cut the butter into the flour. When you cannot see any shreds of butter, run a hand lightly through the mixture. You should still feel little nubs of butter, but no pieces larger than skittles.
In a bowl, whisk the yolk with the salt. Pour this over the flour, and stir in with a wooden spoon. Stir in a tiny splash of cold water. Alternate splashes of water with splashes of orange juice, until the dough is not sticky, but can be pressed together with your hands into a slightly crumbly ball. Remember, dry dough is going to be impossible to roll out, so err to the side of moistness. Press the ball into a smooth disk, wrap in cling film, and leave in the fridge for at least half an hour, and as long as two days. It might be slightly elastic if used within an hour, but the dough shouldn’t shrink while baking.
When you’re ready to bake, preheat your oven according to your recipe (I typically preheat at 400F/200C, and then reduce to 350F/180C when I put the pie in). Take the dough out of the fridge, and roll it out on a floured table or counter. Place in your pie tin, and trim the edges so there’s a ¾in./1½cm overhang. Tuck this overhanging pastry under your crust, but over the pie rim. This should give you a thicker edge to your crust. Indent this edge with the tines of a fork all the way around the pie rim, to create a pretty pattern and lightly anchor the crust to the dish. Prick the bottom of the crust with a fork, then place the pie tin in the fridge while you prepare your filling. Put the filling in the crust, sprinkle the edges with sugar, and place the pie in the oven.
Cook for 30-50 minutes, depending on your filling and recipe.
Optional: A lot of tarts in Italian pasticcerie have a bit of lemon zest in the filling or the crust, and I find adding the fine zest of half a lemon adds a different element to normally plain pie crusts. It usually doesn’t impart a strong, lemony flavour. The sugar seems to neutralize its acidity, leaving a bright, fresh taste which goes very well with fruit fillings. I also love a sprinkling of dried ginger in apple pie crusts.


